


If you teach a language, short videos are the cheapest way for new students to find you. One clear 40-second video about a mistake every learner makes can reach more people than a month of posts. The problem is time. Writing, recording, cutting, adding captions and fixing the timing take hours, and many teachers stop after a few videos.
This guide shows a faster way. You build the video as a set of slides, the way you would build a lesson, and export it as a vertical video. You never touch a timeline.
What makes a language video work
The language videos that people save and share usually have the same shape:
- One idea. One phrase, one rule or one mistake. Not "10 Spanish verbs".
- A hook on the first slide. A question or a mistake the viewer recognises, like "You say I am agree. Here is why it's wrong."
- Show, then explain. The wrong version, the right version, then one line on why.
- A quick check. One question the viewer answers in their head before the answer appears.
- Under a minute. 30 to 60 seconds is enough for one idea.
These formats work well for language teachers:
- False friends, words that look like your language and mean something else
- Say it like a native, one phrase written formally and then casually
- Grammar myths, the "rules" learners get wrong
- Real conversations, exactly what to say at a café, at the doctor or in a job interview
- Song lyrics, the words of a song your audience already loves
Step 1. Start a short
On OwnSlides, a short is a slide lesson you can post as a video or give to your students. Open Create, pick Shorts and press Make a short. Choose the language you teach and your audience's language, give the short a name, and the editor opens.
You can write every slide yourself or have the editor draft them. Press Add Slide and choose Generate Short. Describe the topic the way you would explain it to a colleague, for example "the difference between ser and estar for A2 learners, 45 seconds". You can put the number of slides, the length and the level in the description.
Then pick a Short style. The styles match the formats above: Grammar Myths, Slang & Informal, Cultural Differences, Real Conversations, False Friends, Say It Like a Native, Song Lyrics, and Classic Short, which mixes vocabulary, grammar and practice. For Song Lyrics, paste the lyrics and the short uses the real words.
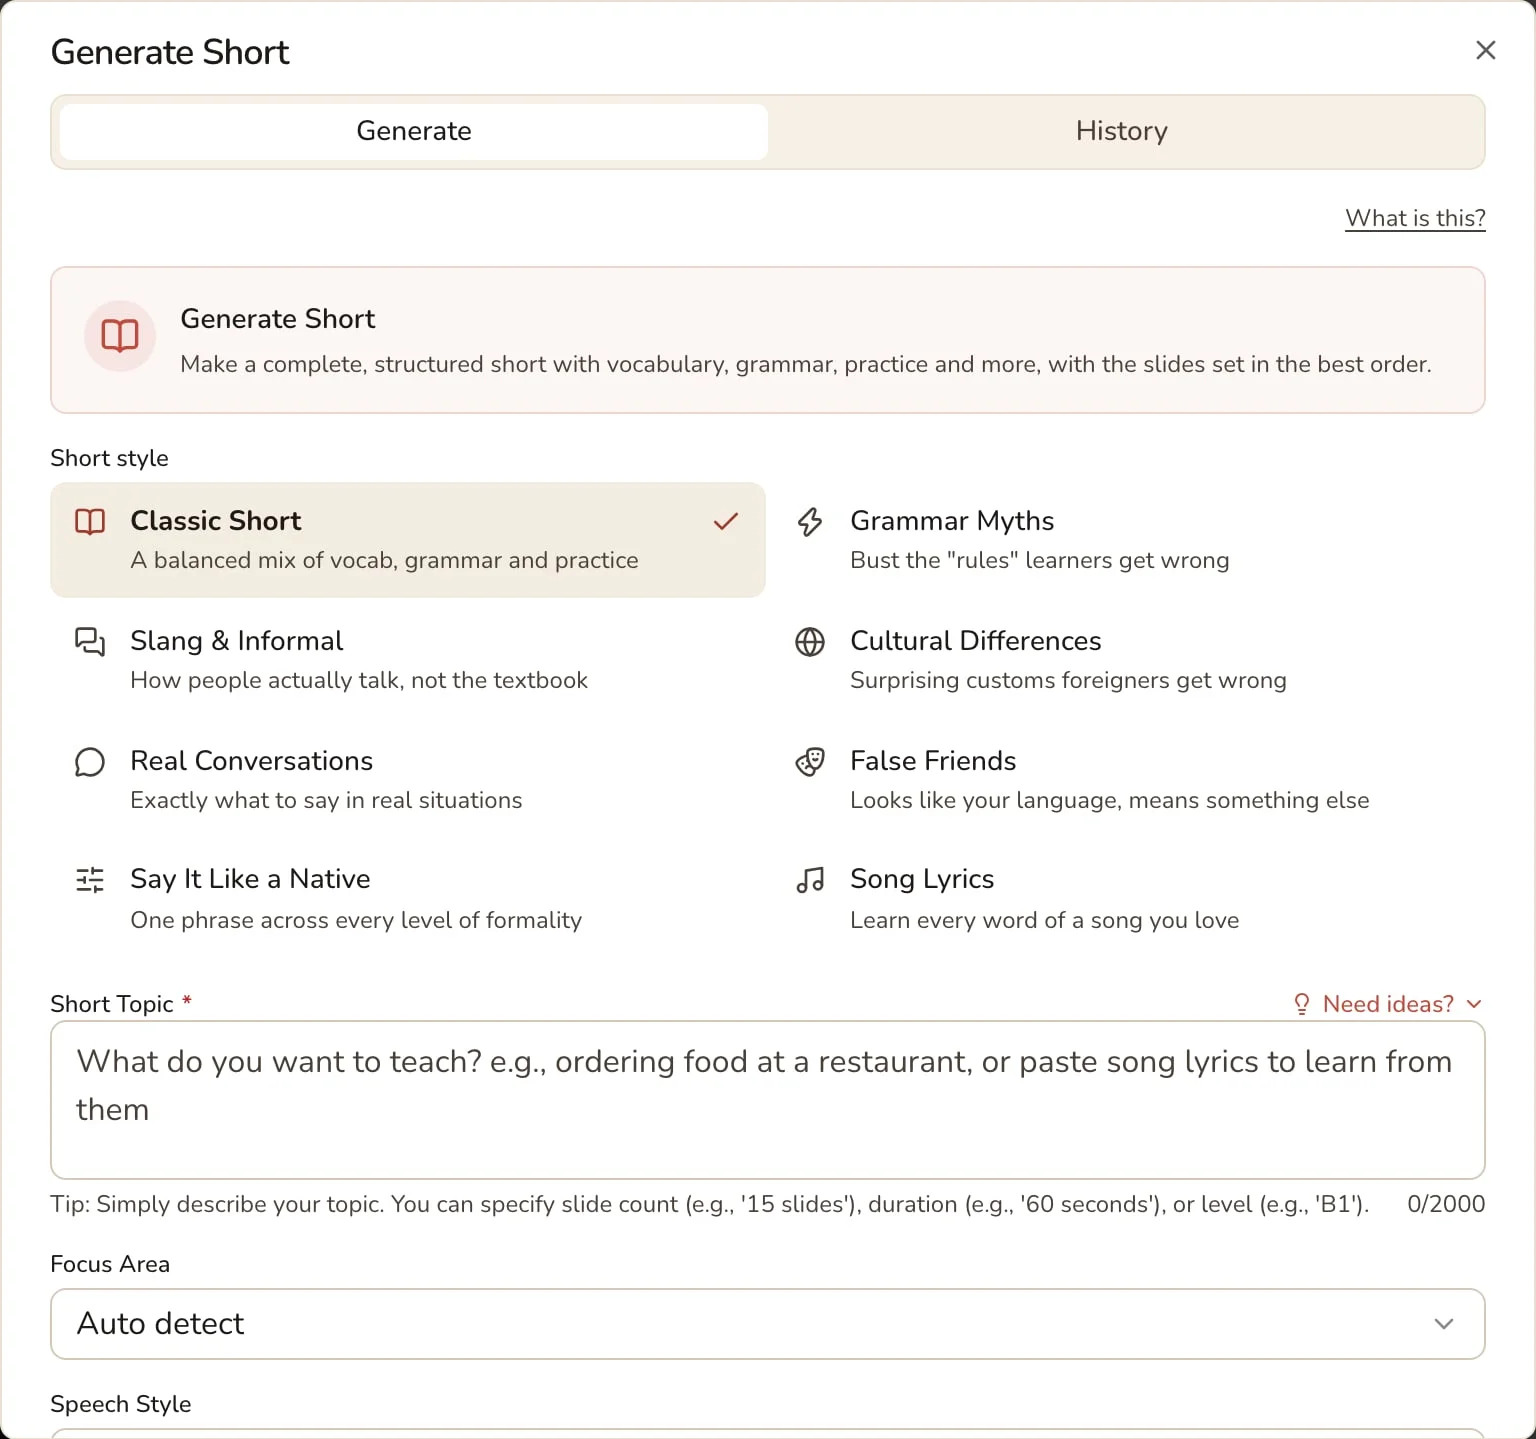
The form has a few more options:
- Target duration, 30 seconds, 1 minute, 1.5 or 2 minutes
- Focus area, vocabulary, grammar, conversation or a mix
- Proficiency level, or Auto
- Include interactive slides, which adds quick practice such as filling a gap or putting a sentence in order, good for the quick check
- Branding, your brand name and social handles, shown on the video
Step 2. Check every slide
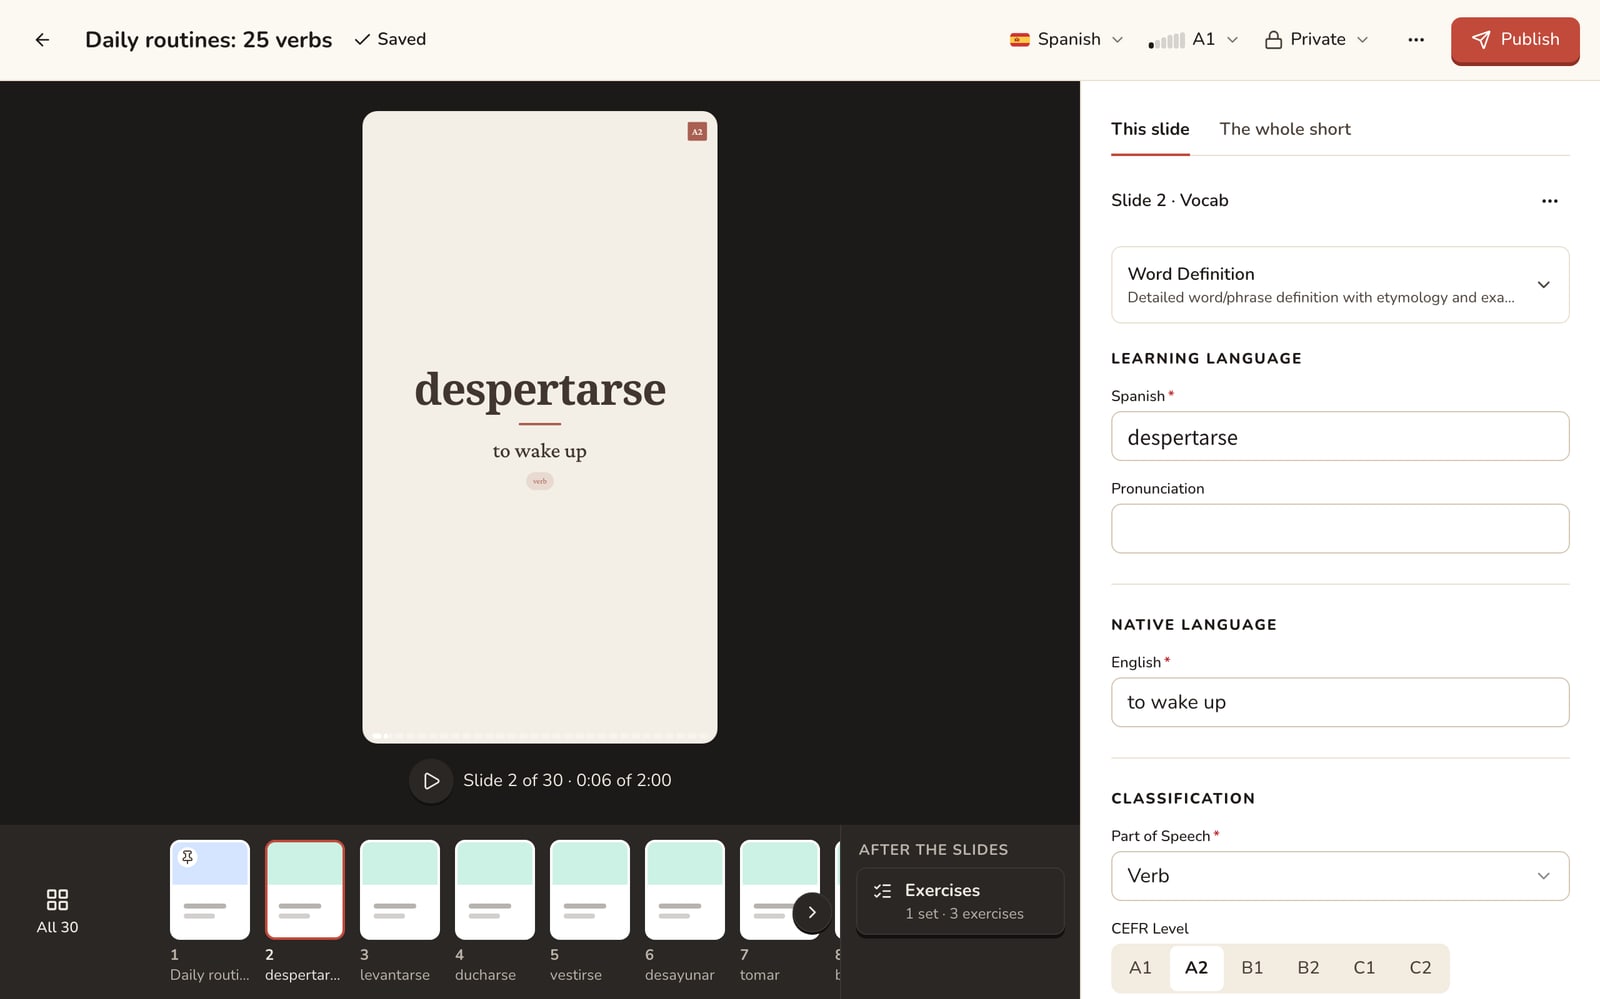
The draft can contain mistakes, so read every slide as a teacher would. Change any example that sounds unnatural, shorten any line that would not fit on a phone, and cut slides that repeat.
Two rules help slides read well on a phone:
- One line of text per idea. If you need two sentences, use two slides.
- The target language big, the translation small. Viewers came for the language.
Step 3. Add voice and music
For each slide you can add:
- Text to speech, so learners hear how the phrase sounds
- Your own voice, recorded on the slide
- Music or sound effects, with the music lowered automatically while a voice plays
If you teach pronunciation, record yourself. Viewers hear how you speak and explain before they ever book a lesson.
Step 4. Export the video
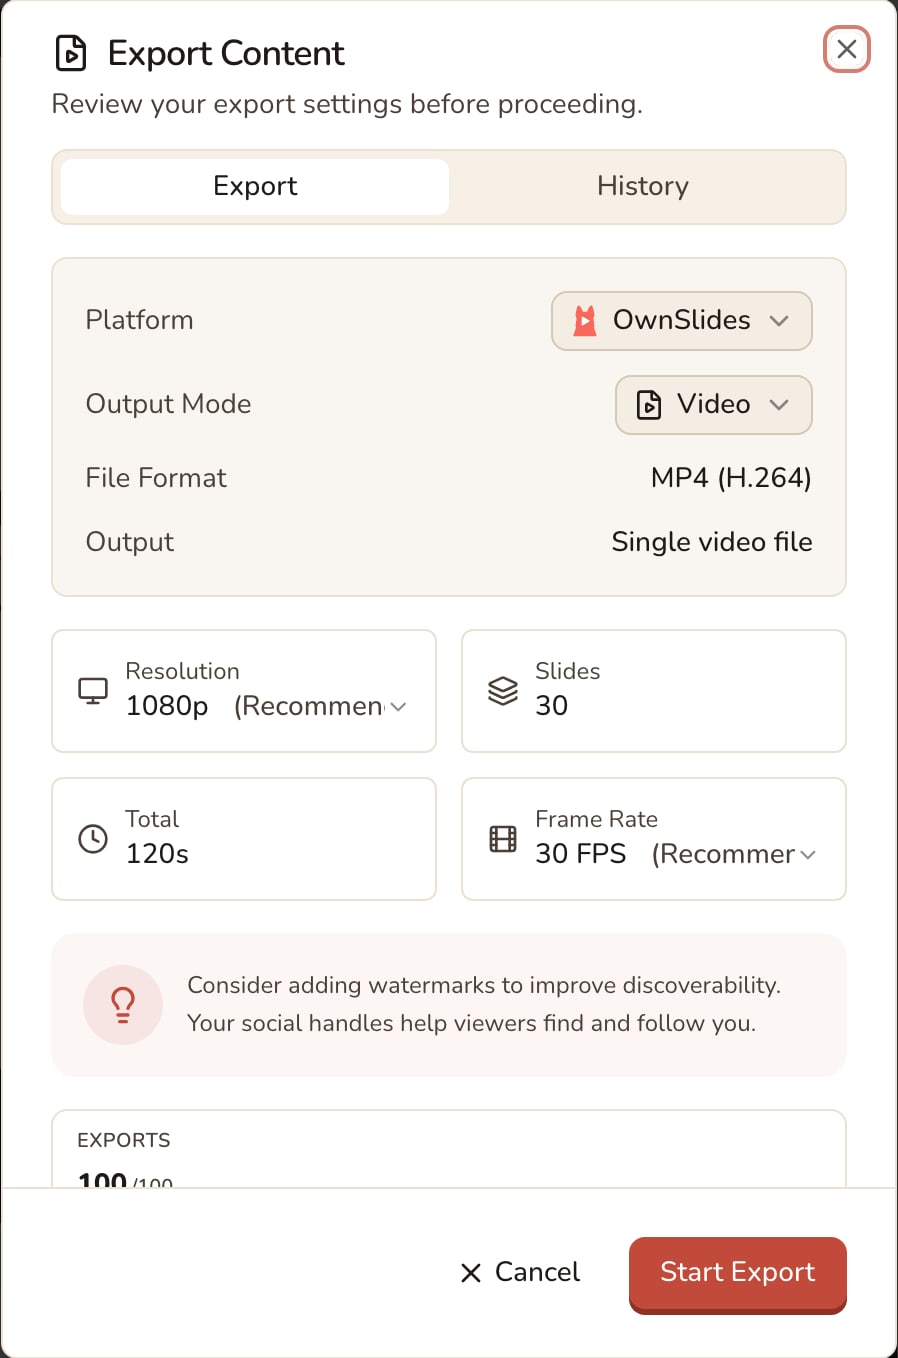
Open the menu with three dots, choose Export video or pictures and keep the output as a single MP4 video file. If you would rather post a carousel, you can export the slides as separate clips or images.
On the free plan, a video can have up to 10 slides and shows a small watermark with your social handle, so viewers can find your account. With Plus you can export up to 30 slides in Full HD, without the OwnSlides mark.
The export runs on our servers, so you can close the tab and come back when it is ready.
Step 5. Post it, then use it again
Post the video to Instagram Reels, TikTok and YouTube Shorts. The same vertical video works on all three. In the caption, repeat the idea in one sentence and ask a question that invites a comment, like "Which one did you learn at school?"
The same short is also a lesson your students can watch and practise with. You can give it to one student or a whole class, with a deadline if you like, and see who watched it. If you have a teacher page, your public shorts show there too. A viewer who likes your video can watch more and book a trial lesson.
A simple posting plan
Picking the topic in advance saves a decision every day. One week could look like this:
- Monday, a false friend
- Wednesday, one phrase written formally and then casually
- Friday, a mistake your students made this week, without names
At about fifteen minutes per video, three videos a week is a pace most teachers can keep.
Quick checklist
- One idea per video and a hook on the first slide
- 30 to 60 seconds, and no more than 10 slides on the free plan
- Every slide read and corrected by you
- Your voice on at least one slide
- The same video on Reels, TikTok and Shorts
- The short given to your students too
Make your first short. It is free to make and publish.