


You teach twenty new words on Tuesday, and on Thursday half the class remembers four of them. Between the two lessons, most students never looked at the words again.
A vocabulary deck closes that gap. Students practise a few minutes a day, and each word comes back just before they would forget it. This guide shows how to make a deck for your students in about five minutes, give it as homework and check who practised.
Why a deck works better than a word list
Students read a list once. They practise a deck in short sessions over several days, and the words they get wrong come back sooner than the ones they know. This method is called spaced repetition, and researchers have studied it for decades. We summarised what the research says.
A deck also helps you as a teacher:
- Homework that marks itself. You don't collect or check anything.
- A record of practice. You see who practised before the lesson starts.
Step 1. Decide what goes in
A good deck for one week has 10 to 25 words from one topic or one lesson. Pick words your students will meet again soon, in your next lesson, in a text you will read together or in a conversation you will practise.
You can start from:
- A topic, like "ordering at a café, A2"
- Your own list, the exact words from today's lesson
- A text you will read together. Pick the 15 words your students won't know and paste them as a list.
Your own list usually works best, because students learn the words you will actually use in class.
Step 2. Make the deck
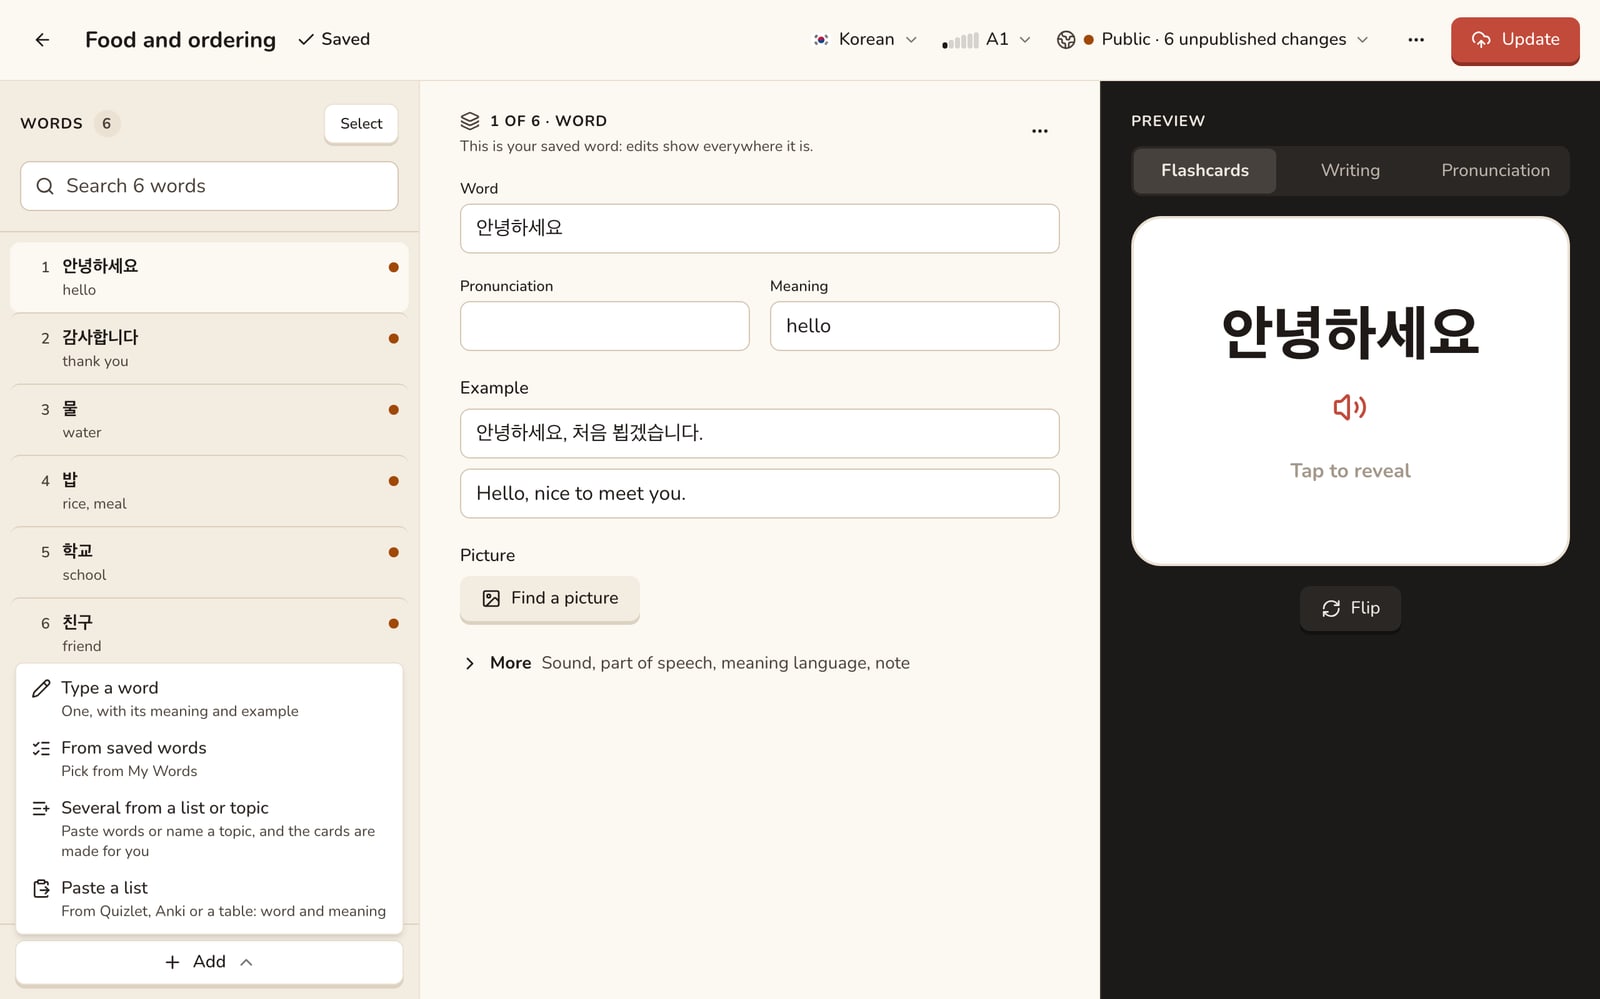
On OwnSlides, open Create, pick Decks and start a new deck. In the deck editor, press Add. You get four ways to fill it:
- Type a word, one at a time, with its meaning and an example
- From saved words, picked from the words you already saved
- Several from a list or topic, where you paste words or name a topic and OwnSlides makes the cards
- Paste a list, for a word list you already have in Quizlet, Anki or a table, with each word and its meaning
For a new lesson, Several from a list or topic is the fastest. Pick the language for the meanings, then choose Topic, My list or Surprise me, and pick a level or let it match the learner's level. You get up to 25 words, each with a meaning, pronunciation and an example sentence. OwnSlides skips words already in your collection, and a narrow topic gives fewer words instead of filling the deck with words nobody needs.
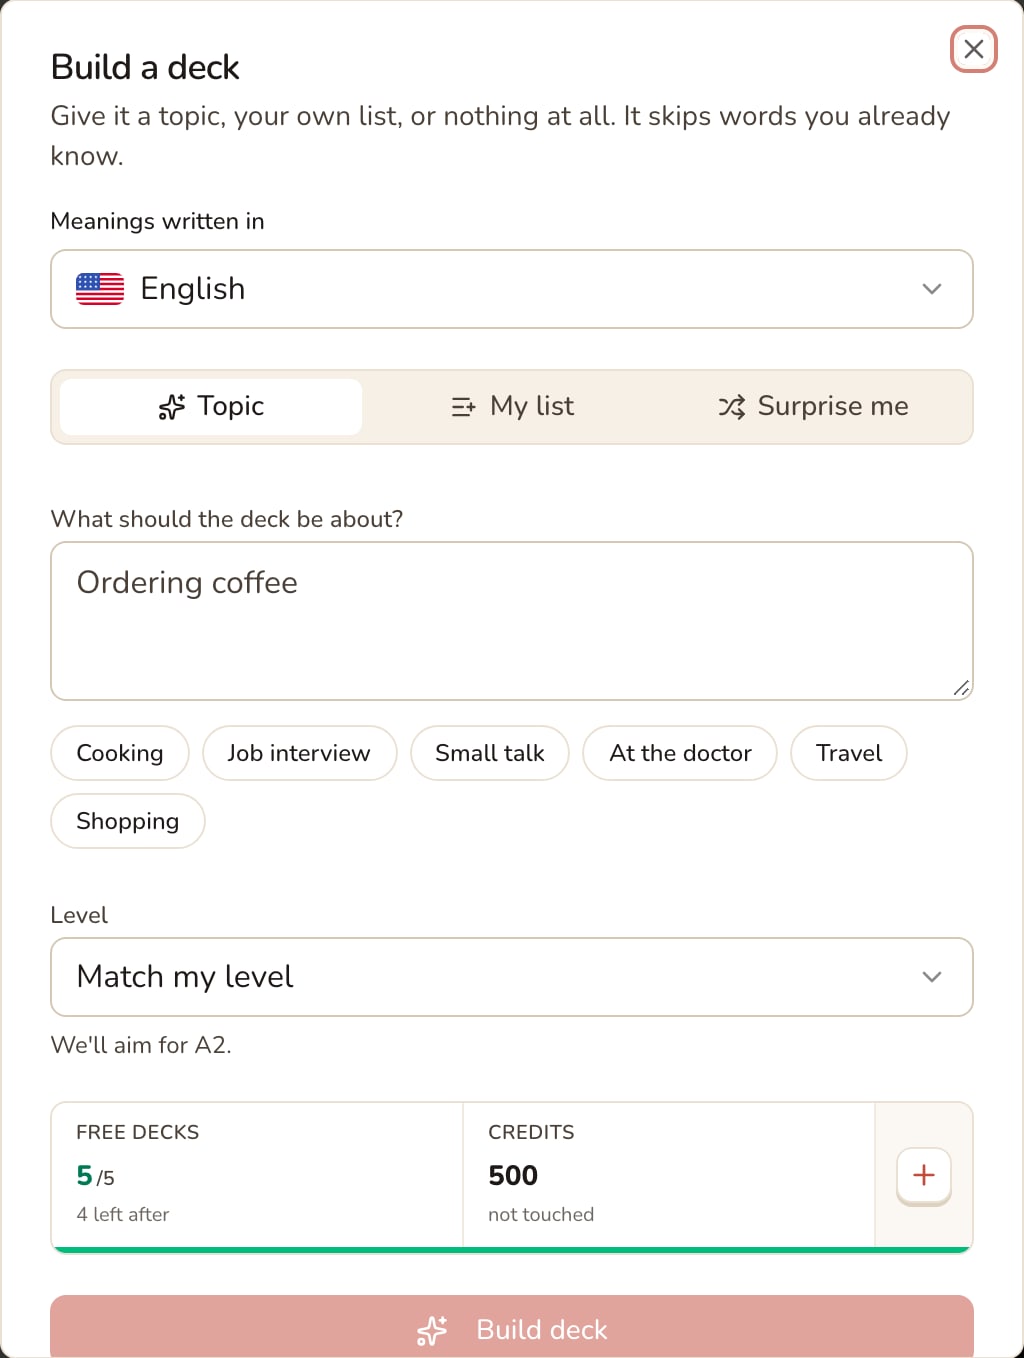
Your first deck each day is built for free on every plan, and you can always type the cards yourself.
Step 3. Check the cards
Read the deck the way you would read a student's homework, and look for these:
- The meaning you teach. A word can have five meanings. Keep the one from your lesson.
- Natural examples. If an example sentence sounds like a 1990 textbook, rewrite it.
- The right level. Remove words that are too easy or too far ahead.
A new deck is a private draft. Nobody sees it until you publish it or give it to students.
Step 4. Give it to your students
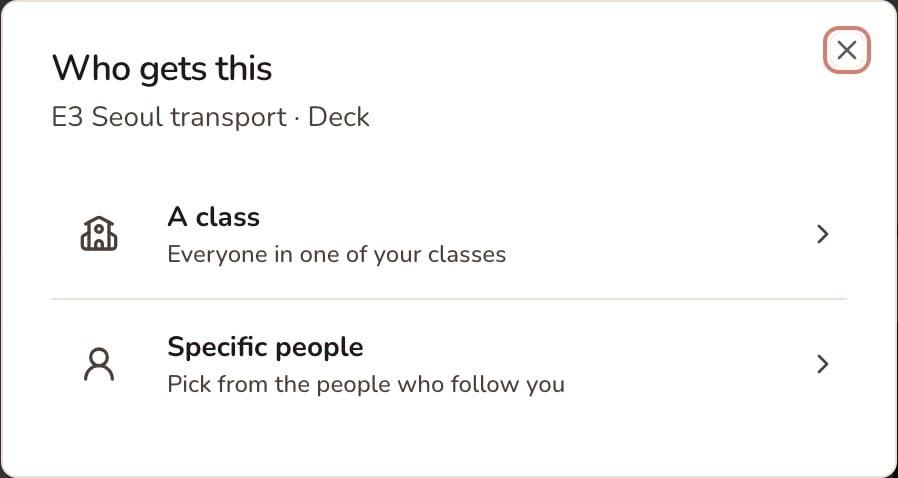
When the deck is ready, give it to one student or a whole class. You can add a deadline, for example the day before your next lesson.
Students practise on their phone or computer for a few minutes a day. Each word comes back on its own schedule. A student who already knows "la cuenta" won't see it ten times, and a student who keeps forgetting "el camarero" will see it more often.
You can also attach a deck to a note or a short, so students practise the words next to the explanation.
Step 5. Check who practised
Before the next lesson, open the deck and see who opened it, who finished it and how many students practised this week. Use that to plan how the lesson starts. If most of the class practised, open with a conversation that uses the words. If few did, start with a quick game and move the conversation later.
After a few weeks you will also see which students practise every week and which practise only before a test. Asking a student about that pattern gets a more honest answer than "did you study?"
Already using Anki or Quizlet?
Your students don't have to start over. They can import Anki decks in .apkg or .colpkg format, CSV files and Quizlet exports. OwnSlides keeps their review history, so a card they have known for 45 days stays known.
A five-minute routine after every lesson
- Right after the lesson, paste the new words into a deck. This takes about 2 minutes.
- Check the meanings and examples, about 2 minutes.
- Give the deck to the class with a deadline before the next lesson, about 1 minute.
With these five minutes after each lesson, your students arrive at the next one already knowing the words.
Quick checklist
- 10 to 25 words from one topic or one lesson
- The meaning you taught, natural examples and the right level
- Given to the class with a deadline before the next lesson
- Checked before the lesson to see who practised
- The lesson plan adjusted to what you see
Make your first deck. It is free to make and to give to your students.